

Feeling overwhelmed by your upcoming gypsum board project? You want a professional finish, but the process seems complex. The fear of mistakes and extra costs is real.
The best practice for installing gypsum board is to start with a clean, prepared surface and use the right tools. Measure and cut the board precisely, then fasten it securely to the framing. Proper joint treatment and finishing are crucial for a seamless look before painting.
Starting a new construction or renovation project is exciting. But when it comes to installing gypsum board, that excitement can quickly turn into anxiety. It seems straightforward, but as I've learned over the years in the building materials industry, the details make all the difference. I'm here to share my knowledge, gained from the factory floor to running my own successful business, to help you navigate this process smoothly.
How are gypsum boards installed?
Worried about getting your gypsum board installation right? It's a common concern, whether you're a DIY enthusiast or a seasoned pro. Proper installation is key to a durable, beautiful finish.
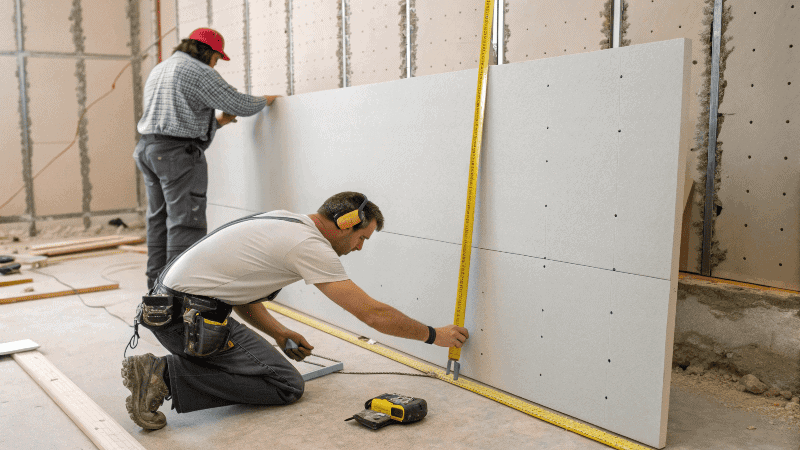
Start by gathering your materials and preparing the work area so it's clean and clear of obstacles. Measure the space and cut the gypsum boards to size. Then, starting from a top corner, secure the boards to the wall or ceiling framing with screws.
Dive Deeper Into the Installation Process
Installing gypsum board, or drywall as it's often called, is a process that requires attention to detail. I've seen many projects, and the most successful ones always start with careful preparation. The first step is always to ensure the framing is sound and the surface is clean. Any debris can prevent the board from sitting flat, which will cause problems later on.
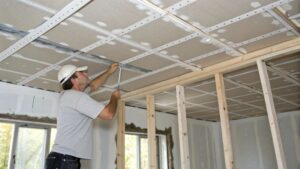
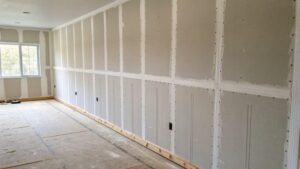
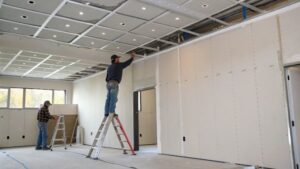
Once you have your clean surface, it's time to measure and cut. Precision is your best friend here. A good T-square and a sharp utility knife are essential tools. After cutting, you'll hang the boards. I always recommend starting with the ceiling. It can be a two-person job, especially with larger boards. For wall installations, place the boards horizontally to minimize the number of joints you'll have to finish later.
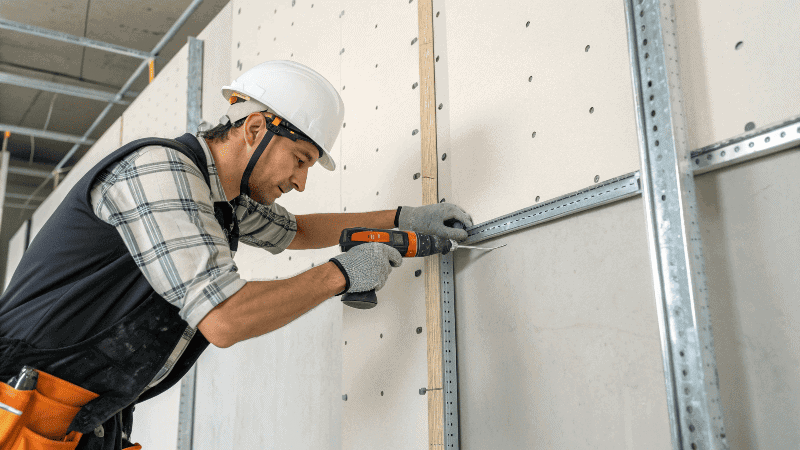
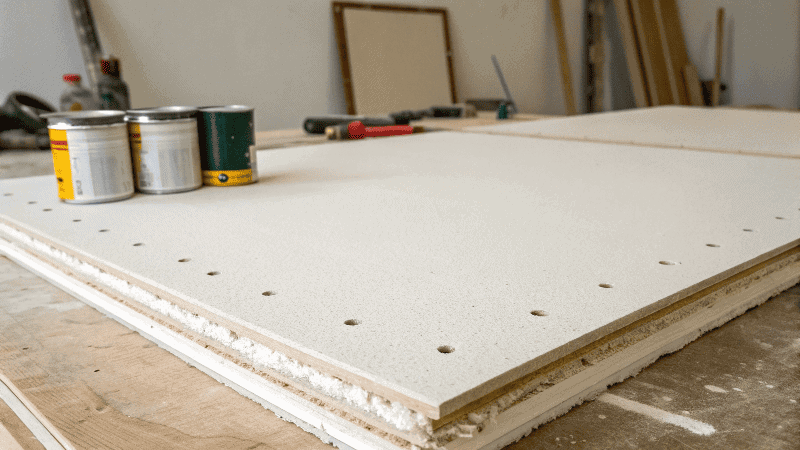
Securing the board is the next critical step. Use drywall screws1 and a drill. Space them correctly, usually about 12 to 16 inches apart along the framing members. After the boards are up, you'll move on to taping and applying joint compound to the seams and screw heads. This is where the artistry comes in. It usually takes three coats, with sanding in between, to get that perfectly smooth surface ready for priming and painting.
Installing gypsum board in humid areas or on ceilings presents unique challenges. The moisture can affect the board and the joint compound2, making it harder to achieve a smooth finish. For ceilings, achieving a perfectly flat, commercial-grade finish requires significant skill and labor, driving up costs.
| Step | Key Consideration | Pro-Tip |
|---|---|---|
| Preparation | Clean, debris-free surface | Remove all furniture and cover floors. |
| Measuring & Cutting | Precise measurements are crucial | Double-check measurements before cutting to avoid waste. |
| Hanging | Start with the ceiling, then walls | Use a panel lifter for ceilings to make the job easier. |
| Securing | Correct screw spacing | Use a drill with a dimpler bit to avoid breaking the paper face. |
| Finishing | Multiple thin coats of joint compound | Allow each coat to dry completely before sanding. |
Can you paint directly on gypsum board?
Thinking of skipping the primer to save time? It's a tempting shortcut, but it might lead to a paint job you'll regret. A pristine finish requires the right foundation.
Yes, you can paint directly on gypsum board, but it's not recommended without proper preparation. For a professional and long-lasting finish, you must at least prime the surface first. This seals the paper and joint compound2, ensuring the paint adheres evenly.
Dive Deeper Into Painting on Gypsum Board
The question of whether to paint directly on gypsum board comes up often. While technically possible, the results are often less than desirable. Gypsum board has a paper face and the joints are covered with compound. These two surfaces absorb paint differently, which can lead to a blotchy, uneven finish if you don't prime first.
I remember a project with a client in the U.S. who was on a tight timeline. He wanted to paint his villa's interior walls directly after the gypsum board was up. I advised him against it, explaining the importance of proper surface preparation. After the base coat and texture were applied, the client was so impressed with the natural, textured look that he decided to forgo the final paint job altogether, embracing the unique finish.
This experience highlights the importance of each step. The standard procedure is to first apply a primer. A good quality drywall primer-sealer is your best bet. It equalizes the porosity of the paper and the joint compound, creating a uniform surface for your paint. Some painters even recommend a "mist coat," which is a thinned-down coat of emulsion, to seal new plasterboard before painting.
After priming, you're ready for your color coats. Usually, two coats of a quality latex paint3 will give you a beautiful, even finish. Don't skimp on the paint quality; it really does make a difference in the final look and durability of your walls.
What is the difference between gypsum board and drywall?
Confused by the terms gypsum board, drywall, and plasterboard? It's a common point of confusion, but they are often used to describe the same thing. Understanding the terminology can help you communicate more effectively on your project.
Essentially, "gypsum board" and "drywall" are the same product. The terms are often used interchangeably. "Plasterboard" is another term for the same material, more commonly used in the UK and Australia. The core material is gypsum plaster4 pressed between two sheets of paper.
Dive Deeper Into the Terminology
In my years in the building materials industry, I've noticed how different regions use different terms for the same product. In North America, "drywall" is the common term, while in Europe and Australia, "plasterboard" is more prevalent. "Gypsum board" is a more technical term that accurately describes the material's composition.
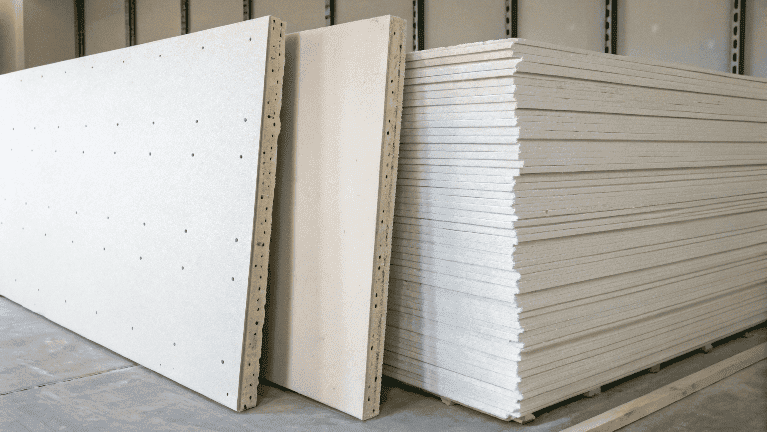
These boards are made of gypsum, a naturally occurring mineral, that is pressed between two sheets of thick paper. This manufacturing process is what gives the board its strength and rigidity. While the names may differ, the fundamental product and its application in creating interior walls and ceilings are the same.
There are, however, different types of gypsum board designed for specific applications. For example, some boards are more moisture-resistant (often called "green board") and are ideal for bathrooms and kitchens. Others are more fire-resistant or designed to reduce sound transmission. The thickness of the boards can also vary, with thicker boards providing more sound insulation and durability.
Understanding these subtle differences is key to choosing the right material for your project. For most standard home projects, the regular gypsum board is sufficient. But for areas with specific needs, it's worth looking into these specialized options.
How to apply gypsum plaster on a ceiling?
Applying plaster to a ceiling feels like a job reserved for the pros, right? It's a challenging task, but with the right approach and a bit of practice, you can achieve a great result.
To apply gypsum plaster to a ceiling, start by preparing the surface to ensure it's clean and ready for plastering. Mix the plaster to a smooth consistency and apply it with a trowel in even strokes. Build up thin layers, allowing each to partially set before applying the next.
Dive Deeper Into Ceiling Plastering
Plastering a ceiling is definitely one of the more advanced DIY tasks. Gravity is not your friend here, and it takes practice to get a smooth, even finish. As someone who has seen countless projects, I can tell you that preparation is ninety percent of the job. Make sure your ceiling is clean, free of dust, and any cracks are repaired.
When you're ready to mix the plaster, always add the plaster to the water, not the other way around. This helps to avoid lumps and ensures a consistent mix. You're looking for a thick, creamy consistency.
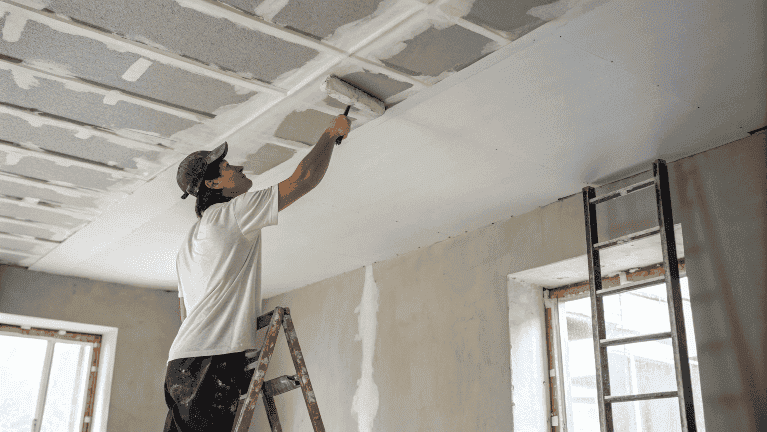
Applying the plaster takes a bit of finesse. You'll use a hawk to hold the plaster and a trowel to apply it to the ceiling. Work in small, manageable sections. Apply the plaster in a thin, even layer with sweeping strokes. It's important to keep the trowel5 at a slight angle to the ceiling.
After the first coat has firmed up a bit, you can apply a second, thinner coat to smooth everything out. Finally, once the plaster is fully dry, you may need to lightly sand any imperfections before you can prime and paint. Plastering a ceiling is labor-intensive, but the incredibly smooth, durable finish is well worth the effort.
Conclusion
In short, successful gypsum board installation hinges on careful preparation, precise execution, and proper finishing. With the right techniques, you can achieve a professional and lasting result for your project.
1. Drywall screws provide stronger, more secure fastening, reducing the risk of board movement or popping over time. ↩
2. Applying joint compound correctly ensures smooth seams and a flawless surface for painting or wallpapering. ↩
3. Latex paint offers durability, easy cleaning, and a smooth finish, making it ideal for gypsum board surfaces. ↩
4. Learning to mix and apply gypsum plaster correctly ensures a smooth, durable ceiling finish that lasts for years. ↩
5. A trowel is essential for spreading plaster evenly, ensuring a smooth and professional ceiling or wall finish. ↩