

It looks simple to install, but small mistakes can ruin the final finish.
Gypsum board is used by cutting to size, fastening to framing, sealing joints, sanding smooth, priming, then applying paint or other finishes.

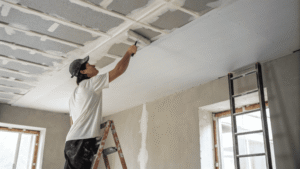
In my 15 years in interior renovation, gypsum board has always been one of the most common materials. It’s light, fire-resistant, and ideal for creating smooth surfaces for walls and ceilings. But it’s also the kind of material where the result depends entirely on how well you install and prepare it. The process is not just about screwing it into place. It needs accurate measurement, precise cutting, neat fastening, and careful joint treatment before you can move on to decoration. Skipping these steps often leads to cracks, peeling surfaces, and costly repairs.
How is gypsum board applied?
It’s not just hanging panels—every stage matters.
Gypsum board is applied by fixing sheets to wood or metal studs with screws, sealing all joints and screw holes, sanding, priming, and finally applying finish coats.

The most critical step is joint treatment. First, you align the panels and fasten them to the framing, keeping screw spacing at about 20–30 cm. Then every seam and screw head gets covered with joint compound and tape. This fills gaps and stops cracks from forming later. After the compound dries, you sand the surface, reapply as needed, and repeat sanding until perfectly smooth. Only after you’ve primed the surface can you move on to paint or wallpaper. I’ve seen DIY installations that skipped joint treatment entirely, and within months the seams cracked. This is why even experienced DIY renovators sometimes call in professionals for finishing.
Key steps in gypsum board application
| Step | Purpose | Risk if skipped |
|---|---|---|
| Measure and cut | Ensure tight fit to framing | Gaps and uneven surfaces |
| Screw into framing | Secure attachment | Loose, noisy panels |
| Tape and joint fill | Seal gaps and hide seams | Visible cracks, weak structure |
| Sand and recoat | Smooth surface for finish | Uneven paint or wallpaper |
| Prime | Seal porous surface | Poor paint coverage, blotches |
What is gypsum board used for?
Its versatility makes it a building standard.
Gypsum board is used for interior walls, ceilings, partitions, and decorative elements, offering a smooth, paint-ready or wallpaper-ready surface.

Gypsum board—also called drywall or plasterboard—appears in almost every modern building. I’ve used it on residential walls, office ceilings, hotel partitions, and even custom feature designs. For dry areas like bedrooms or offices, standard gypsum board works well. For kitchens or bathrooms, moisture-resistant types prevent swelling and mold. In fire-rated areas, such as exit corridors or kitchens near heat sources, fire-resistant gypsum board is the standard. Choosing the right type directly affects performance and durability. I’ve seen homeowners use regular board in bathrooms, only for it to warp and mold within six months.
Common types and uses
| Type | Main Use | Feature |
|---|---|---|
| Standard gypsum board | Dry interior walls and ceilings | Light, smooth surface |
| Moisture-resistant | Bathrooms, kitchens | Green or blue paper, resists humidity |
| Fire-resistant | Fire-rated walls and ceilings | Extra fire-resistant materials |
Painting preparation steps
| Step | Reason |
|---|---|
| Joint compound + tape | Hides seams, prevents cracks |
| Sanding | Smooth finish for paint |
| Primer coat | Improves adhesion and uniform color |
| Topcoat | Final appearance and protection |
Conclusion
Gypsum board is versatile and durable, but only when installed and prepared correctly. Careful joint treatment, sanding, and priming are essential for a flawless and long-lasting finish.